Elysian Park

LA_ELYSIAN_PARK_1

The day started early, around 4am, so we could get to our first destination in LA by sunrise. As you can see, traffic got in the way of that a little bit, but with the camera ever at the ready even this small setback could be turned into a triumph.

I love the way the moon still hovered over the city as the sun started bathing LA in her golden rays.

Our first photo location was Elysian Park. It’s amazing how just a short drive takes you out of the hustle and bustle to this very peaceful and serene place; it’s a world of its own, and on a clear day I bet the view is breathtaking.

Using the camera my friends got me for my birthday a while back I was able to see Dodger Stadium quite clearly– I’ve never actually been there, but I got pretty close with the zoom, right? 😉

Cheers!
Ines ❤
LA_ELYSIAN_PARK_2LA_ELYSIAN_PARK_3LA_ELYSIAN_PARK_4LA_ELYSIAN_PARK_5

LA_ELYSIAN_PARK_6
I don’t often title my photographs, but if I did I would call this one “Early Morning Shift.”

LA_ELYSIAN_PARK_7LA_ELYSIAN_PARK_8

Chinatown Metro

LA_CHINATOWN_METRO_1s

I spent yesterday morning in LA scouting some locations for future photo shoots and checking places out that other people recommended online.

One of the stops on the list was the Chinatown Metro station. I have to admit that I’ve never actually taken the metro (or any trains) in California, mostly because it’s not ever a convenient means of transport when I’m going somewhere, but that doesn’t change the fact that I am fascinated by trains and tracks and all that goes along with them.

This collection shows some of the views that caught my eye. Stay tuned because I’ll be sharing other photos from different locations soon!

Cheers!

Ines ❤

LA_CHINATOWN_METRO_2sLA_CHINATOWN_METRO_3sLA_CHINATOWN_METRO_4sLA_CHINATOWN_METRO_5sLA_CHINATOWN_METRO_6s

Wishes From Me To You

I have been revising this poem for the last few days, but I think it’s finally finished now; this is the third version of what was quite a bit longer the first time around.

I can’t remember who said it originally— maybe it was Hemingway?— but the teacher I had for my creative writing classes at university told us we should keep writing even if we thought a piece was finished. I did that for my initial draft: I got my ideas out so I had all the “raw materials” to work with. What started out as a very freeform 38-line poem is now a much stronger 20-line piece.

Editing is a hard process for me; it takes me a lot of time and effort and most of the time I cut things out only to put them back shortly after because I figure “I put it there for a reason, why take it out now?”

Each time I approached this poem I managed to chisel a little more away, always tightening the structure, and distilling the words until I had only the essentials. Some lines or images I quite liked didn’t end up in the final version, but that just means I can use them in a different piece.

Typically most of what I write is heavy, sad, or dark. As such, I’m happy to say that this piece deviates from that mood a bit, and moreover that it might be my new favorite 🙂

Enjoy! ❤

***

Wishes From Me to You

Forget diamonds and pearls
Instead bring me a daisy chain
A thing so delicate
Made with your own two hands

Forget a dozen long stemmed roses
Instead bring me a single flower
You found on your way home
To show me that you thought of me

Forget talk of money and wealth
Instead tell me all your dreams
Share with me your mind and soul
And I’ll share mine with you

Forget a mansion or estate
Instead let us build a simple home
One that grows and shrinks with us
Breathing like we do

Forget a legacy to leave behind
Instead let us build our life
A stream of moments
Bound together by our love

***

Foggy Morning

foggy_morning_1

The fog this morning was the heaviest I’ve seen in this area in a long time and the temperature hovered just around 4 degrees Celsius.

I love the eerie mood of these shots and the monochromatic look despite the fact that these are color photos; you probably wouldn’t have guessed it if it wasn’t for the traffic lights 😉

foggy_morning_2foggy_morning_3foggy_morning_4

Cushion Commission

cushion_a_1

A friend of mine asked me if I’d be able to make new cushion covers for her outdoor furniture so I’m currently in the midst of this project. I had to special order two of the three fabrics I’ll be using (which hasn’t run as smoothly as I’d liked…) and the one I show here we had to order online from JoAnns.

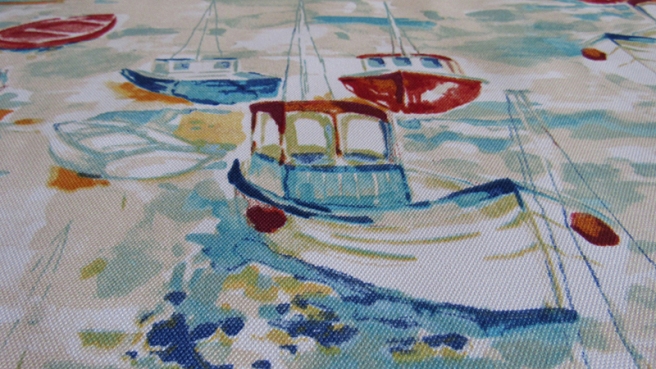
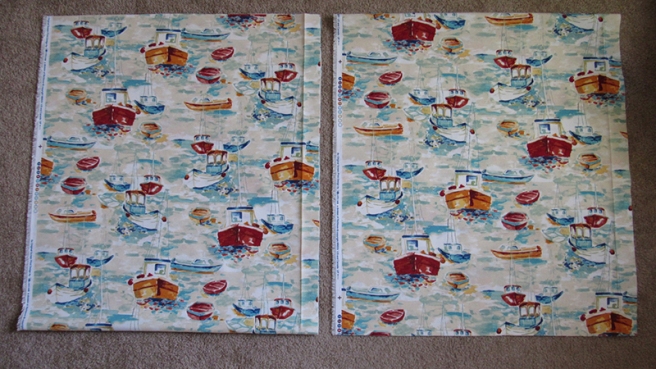
It took a while to find which fabric we wanted to use. My considerations were manifold: it needed to be dirt/stain resistant since it’ll be outside, it should be a happy color, and it shouldn’t fade too easily/badly. A multicolored fabric hits all those points: any stains could be masked by the pattern, it’ll be lively, and it won’t look splotchy if it fades. As I said before, we chose three fabrics in the end (we found too many that we liked): one is a more solid green/blue color (this is for the cushions to sit on; Solarium Outdoor Fabric in Lagoon), the one pictured here (used for some of hte back cushions; called Solarium Outdoor Fabric in Sail Away Sailor), and the third I’m still waiting on (also for back cushions; Solarium Outdoor Fabric in Cabana Huts). In the finished design the solid color unifies all the pieces while the sailboat and cabana hut patterns help add variety while still staying true to the theme.

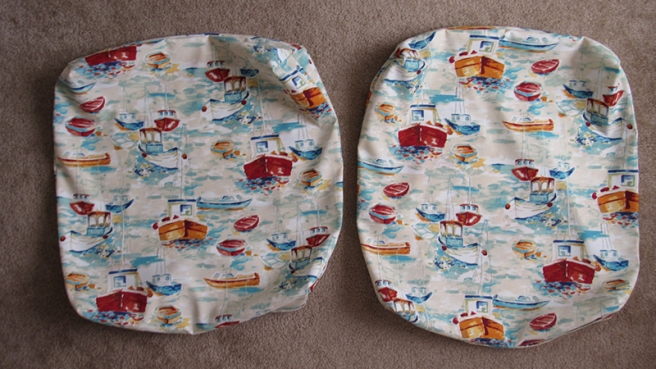
I’m quite proud with how the first two cushions came out so I wanted to share the work I did (the inside is as neat as the outside :)). I started at 7:50am yesterday and worked nonstop until 3:15pm to finish these. In fact I was so engrossed in my work that I didn’t even stop to eat. The pattern on the fabric made it a little more challenging to work with since I needed to figure out how to cut the fabric to make the two cushions identical. It was pretty easy in the end (time consuming and a bit tedious with measurements and such, but not too difficult). Anyways, here is how I did it!

***

Outdoor Cushion Process

1. Cut the fabric. For these cushions I needed my pieces to be 29x32in. Below you see the two sides of one cushion (the duplicates for the second cover are below). The 29in across does not include the white strip of the edge, but I left that on for a step later on.

cushion_a_2


2. Cut the corners to make it easier to shape the cushions. I took out a 3×3 square on the top of the fabric (top of the cushion) and a 3x5in piece on the bottom. I won’t be adding a zipper or buttons to close the covers so I wanted the bottom flaps to overlap enough so they keep the cushion inside while still allowing for the option to take the cover off for washing. Keep it practical! It’s important then to have enough fabric to have the two sides overlap and also to sew the edge over to have a clean edge so it looks professional.


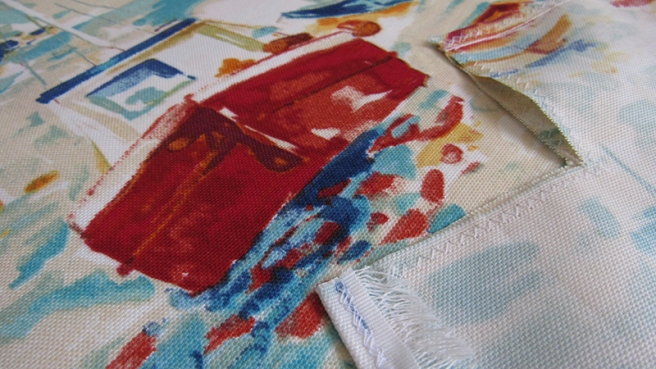
3. Handle the edges. I don’t have a serger but using a zigzag stitch along the edges does the trick too; this is done to keep the fabric from fraying. All cut edges should be sewn over. It takes a while, granted, but it ensures a quality end product.


4. Create a clean edge. Before sewing the appropriate pieces together, make sure the edges of the bottom parts of the fabrics (the 5in wings) are folded over so that the overlapping flaps are neat.

cushion_a_9


5. Sew the sides. I took the two pieces of the cushions (right sides together) and sewed the top edge and the two sides together, making sure that the corners I cut out were still open. Since these seams will need to withstand some tension I added an additional reinforcing zig-zag stitch on the inside of the straight stitch. I mentioned in step 1 that I kept the excess white stripe on the sides; I folded this over the inside seam allowance to reinforce the binding stitch. Note the corner is still open.

cushion_a_10


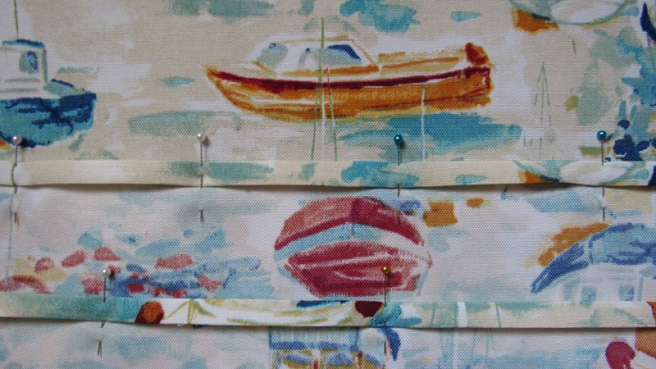
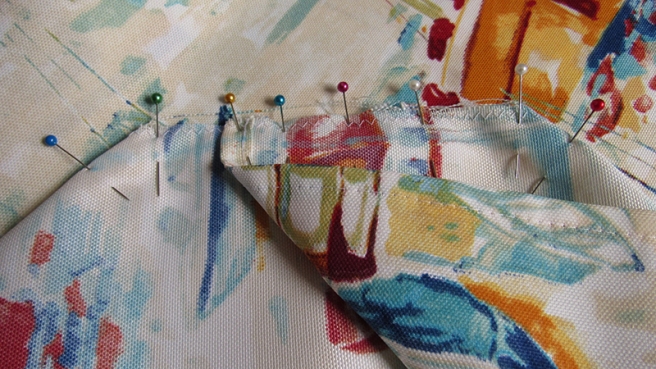
6. Form the corners. Fold the fabric pieces so that the corner forms; do this by bringing the centers of the seams on either side of the corner together and pinning it. The corner of the square that’s formed by the cut out piece should be the end of the line formed by bringing the sides together. As you can see I curved the stitch line a bit to give a rounded edge to the cushion. Reinforce the straight stitch with a zigzag on the inside of the seam (not seen on the photo below).

cushion_a_11


7. Close the bottom. Fold one of the longer bottom wings at a time like you did with the other two corners. Make sure to pin both sides the same way– pin one side of the flap and then the other to avoid accidentally sewing opposite sides of the flaps on either side. Mark the line you’ll stitch and sew. Do this carefully and reinforce the pressure points (where the flaps end for instance). Again I curved the corners a little to alter the look of the finished cushion.

cushion_a_12


8. Finished! After reinforcing all the seams on the inside and trimming any excess threads, turn the cushions around and admire! (The patterns on the cushions are identical, here I chose to show either side).
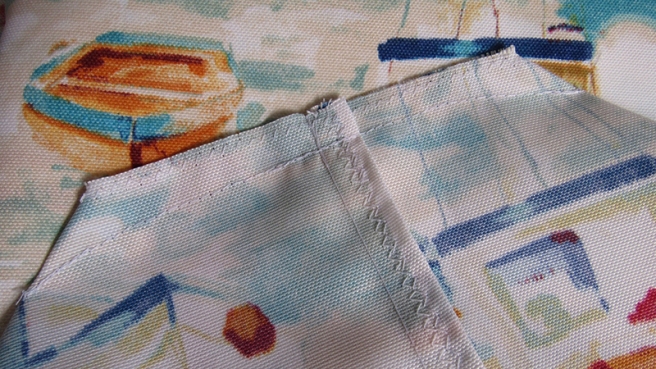
cushion_a_13


Detail shots!

From left to right: the top corner, the overlapping flaps at the bottom where the cushion will be inserted, and what the bottom corner looks like. As you can see, in the middle image, the edge extends past the center seam along the sides (unlike the top corner where everything meets neatly). If I’d used a zipper it would run across the middle, but my method leaves enough fabric overlapping to properly cover and hold the cushion.


Apart

apart
 
Apart
(October 6, 2016)
.
Live with me in this space of ours
A bubble apart from the world
Hover with me above the ground
Our feet evermore dancing on clouds
.
Share the warmth coming from my skin
Feel it radiate outward from my heart
Gaze deep into my eyes as I gaze into yours
So we become trapped
Somewhere between sea and land
Somewhere between cool blue and melted caramel
.
Exist in this moment
For the rest of time
Knowing only this
Only us
Until time ceases
And the universe is extinguished
.
Never forget the feeling you got
When you first laid eyes on me
Just as I’ll never forget the electricity
That ran through my spine at your first touch.
.
 

Colors and Patterns

colors_and_patterns_1

I tried to have a camera handy at all times last May while my friends and I were in Germany and Paris. Most of the time I didn’t have specific things in mind that I wanted to capture (except the sights of Paris that most people want to see) and, since you never know what you might come across, my mindset was better safe than sorry. Of course I made sure to actually experience being in Europe while I was there as well, I didn’t just try to capture it for later 🙂

Some of the things that caught my attention were the patterns and colors all around. It seems to be a human trait to detect patterns and ascribe meaning to them (when applicable) and the photos here show some of the patterns that I found interesting.

I don’t know how many stairs my friends and I climbed during our vacation, but all I can say is that it was good exercise! There were so many spiral staircases and countless steps in Notre Dame alone– it seemed never-ending going up the towers and then again coming down– but it was good fun and surprisingly it didn’t leave me sore. I am pretty athletic but I have to admit that my legs were shaking by the time we got to the bottom of the stairs that led down from the Turmberg, somehow long, straight stretches of stairs are more intense than spiral ones it seems.

I loved the amount of walking we did during our trip, whether it was through nearby garden plots and forests in Germany, through Disneyland Paris, or the cities and villages we visited. Our trip to Heidelberg was lovely as well; the wooden staircase below is from the Castle there. Fun fact: the people of Heidelberg used to pay taxes in wine so there is a huge wooden barrel in the castle where the wine was kept and it actually has a wooden dance floor on top of it. Not only that, but because so much wine was consumed by the nobility and royals at the Schloss during their functions and the servants had to continuously run downstairs to get more and more wine– leave it to German engineering– they eventually developed a pump system that allowed the wine to simply be pumped upstairs. Nifty, huh? If you ever make it to Heidelberg, be sure to visit the Castle and do the guided tour– there’s so much cool information and the grounds are breathtaking as well.

Anyways, that’s all I’ve got to share for now. I’ve got another post queued up that flows nicely from this one (another photo sequence) so keep an eye out for that. Until then, happy travels and creativity!

colors_and_patterns_2colors_and_patterns_3colors_and_patterns_4colors_and_patterns_5colors_and_patterns_6colors_and_patterns_7colors_and_patterns_8colors_and_patterns_9colors_and_patterns_10colors_and_patterns_11colors_and_patterns_12colors_and_patterns_13colors_and_patterns_14colors_and_patterns_15colors_and_patterns_16

Positives and Negatives

positives_and_negatives_1

I’ve written before about my love for photography and my fascination with the darkroom. Lately I’ve found myself preferring the older, yet timeless and classic look of black and white photographs, even though the lilies I’ve used as my subject have been beautifully vibrant in the flesh. What’s more is I’ve played around with inverting colors using Photoshop, which does something magical to the black and white images, namely transform them into their corresponding negatives so that they look just as they would appear on the 35mm film I used to use in my high school photo class.

My friend mentioned that a photo I posted reminded him of an Andy Warhol piece and while I’ve never been a huge pop art fan I do enjoy patterns and mirroring so I’ve played around with these elements a bit to get the images I’m sharing here today.

The idea of inverting things in order to see them in a new way– with fresh eyes, so to speak– is something I’ve thought of for some time now and I’ve wondered if I can write some sort of argument or commentary about it. I’ve even considered trying to submit a photo series, along with whatever commentary I manage to pen, to a contemporary art museum. I have started something but it isn’t finished yet, who knows if it will ever reach the light or find an audience. Should I come up with something that I find interesting enough to share I’ll post it here for sure. Meanwhile enjoy these images and always entertain the thought that looking at things just a little bit differently might lead you to learn something new or discover something wonderful.

Cheers!

positives_and_negatives_2

positives_and_negatives_3

positives_and_negatives_4

Behind Me

As I fell asleep last night a line came into my head, followed by another, and another. Initially it was a complete concept after about four lines but as I revisited it today it grew into something slightly longer.

Enjoy this little poem.

Hopefully this is the beginning of the end of my writer’s block.

Cheers!

***

behind_me

Behind me

I look at myself in the mirror.
Your body materializes from the darkness
Coming ever closer
Until your head is over my shoulder
My eyes move down
To watch your arms circle my waist
I melt into your embrace
As your hands touch me
And your fingers brush over my skin
I close my eyes
As you whisper in my ear
The words of which I’ll never tire
Your breath on my neck
sends a shiver down my spine
Made more intense
As I turn to kiss you
Only to find you’re no longer there.

***